Leveraging Turso's embedded replicas in real world applications
In this tutorial we are looking into how Turso’s embedded replicas can be used in the creation of real world applications

During Turso's recent launch week, we announced embedded replicas, which are SQLite databases available locally as files that will be in sync with your Turso database on the edge.
Building applications with Turso's embedded replicas allow production applications to read data locally from the SQLite file in microseconds, to create fast experiences.
In this post, we're going to use Turso's embedded replicas to build a desktop note-taking application. With embedded replicas, you get microsecond latency for local reads while maintaining the benefits of low latency writes at the Edge.
We will also be using Tauri, a framework that lets us build optimized, secure, front-end independent applications for multi platforms, and Qwik, the resumable, instant-on applications web framework to build our notes app.
Prerequisites
i) Node.js v16.8 or higher.
ii) Rust installed in your machine.
iii) Platform specific system dependencies to develop Tauri apps:
The source code to the project we'll be building can be found on GitHub.
#Anatomy of the notes app
Our notes app uses the Qwik framework for the user interface and Tauri which is simply a Rust binary that manages windows, the web view, and calls to the operating system through a rust crate called “Tauri”.
We will name the app we are building “Turso Notes”.
Let's start off with the user interface of the app.
#Create and set up a new Qwik project
To create a Qwik app, run the following command.
npm create qwik@latest
For the resulting setup questions, use the following details:
- Where would you like to create your new project? - turso-notes
- Select a starter - Basic app
- Would you like to install pnpm dependencies? - No
- Initialize a new git repository? - Yes/No (Choose based on your preference).
Then, cd into the project and run npm install to install the Qwik project's dependencies.
Since we're using TailwindCSS for the project's styling, configure it for the Qwik project by running.
# install tailwindcss
npm run qwik add tailwind
Configure Qwik in SSG mode by running:
npm run qwik add
Select static site (.html files) adapter from the resulting list. Then you can build the static pages via:
npm run build
With the SSG adapter added, the build files of our Qwik project (.html files) will be generated inside the “/dist” directory.
Clean up all the existing project's routes (.tsx files and subdirectories under the “/routes” directory), leaving only the index (index.tsx) route whose content you'll update by adding the code from the index.tsx file in this project's GitHub repository.
#Create the Tauri project.
Install Tauri by using either cargo or npm:
# npm
npm install —save-dev @Tauri-apps/cli

# cargo
cargo install Tauri-cli
Configure a minimal Rust project pre-configured to use Tauri by running the following command:
# npm
npm run Tauri init

# cargo
cargo Tauri init
Fill the proceeding series of questions using the following options.
- App name: Turso Notes
- Window title: Turso Notes
- Relative web assets directory: ../dist
- URL of the dev server: http://localhost:5173
- Front-end dev command: npm run dev
- Front-end build command: npm run build
After completing this step, you should have a “/src-Tauri” directory at the root of your Qwik project with the Rust source code that comprises of a “main.rs” file to our Rust code under the “/src” directory and a manifest file “Cargo.toml” that contains metadata which is needed to compile the package.
Update the “/src-Tauri/Cargo.toml” and “/src-Tauri/src/main.rs” files with the code inside their respective files from the GitHub project, Cargo.toml and main.rs.
Finally, run cargo tauri dev to see the notes app.
#Setting up Turso
Create a new Turso database by running:
turso db create turso-notes
Get the database's URL and authentication tokens:
# db URL
turso db show --url turso-notes

# authentication token
turso db tokens create turso-notes
Store the two obtained variables in a “.env” file inside the “/src-Tauri” directory.
# src-Tauri/.env
TURSO_SYNC_URL=<OBTAINED-DB-URL>
TURSO_TOKEN=<OBTAINED-DB-TOKEN>
We'll also store the location to the embedded SQLite replica for our Turso database as the third environment variable.
# src-Tauri/.env
DB_PATH=../turso-notes.db
Open the created Turso database on the Turso CLI shell to issue some statements by running turso db shell turso-notes. Next, add a “notes” table to the database by issuing the following SQLite statement.
create table notes(
 id varchar not null,
 title varchar not null,
 `text` text default ('Write something here...'),
 created_at integer default (cast(unixepoch() as int)),
 updated_at integer default (cast(unixepoch() as int))
);
#The app's CRUD functionalities
When you observe the index route of our Qwik project, we have a notes list and a textarea that constitutes what the UI will be.
We also have the create, read, update, and delete (CRUD) functions that communicate with Tauri:
- getAllNotes(): Fetches all the notes from the embedded replica.
- newNote(): Creates a new note.
- updateNote(): Updates notes details
- deleteNote(): Deletes notes.
These four functions communicate with their corresponding Tauri commands to carry out their respective functionalities. The Qwik user interface uses methods inside the @Tauri-apps/api package to communicate and configure some window functionalities supported by Tauri. Install this package by running:
npm install @Tauri-apps/api
Within each Qwik function we are using the invoke() method from the @Tauri-apps/api package to call the respective Tauri command (Rust function with the #[Tauri::command] attribute), in the process, sending and receiving data from our database.
The get_all_notes(), new_note(), update_note(), and delete_note() are the corresponding Tauri commands for the Qwik functions listed above.
The Tauri configuration object inside “/src-Tauri/Tauri.conf.json” lets us configure our Tauri app together with enabling APIs on our front-end via the “allowlist”. An example is the dialog API that lets us prompt the user to confirm a note delete action which is enabled by adding the following configuration to the “Tauri” > “allowlist” section.
"dialog": {
  "all": true,
  "ask": true,
  "confirm": true,
  "message": true,
  "open": true,
  "save": true
}
With the DB_PATH=../turso-notes.db set, whenever our running app synchronizes with Turso, changes are replicated to the "/turso-notes.db” embedded replica, in the process we end up with a local copy of our Turso database. The embedded replica database enables us to experience microsecond reads since requests don't go through the network. For example, I was getting reads with a time delta average of 624.789µs while running this app.
Since Turso's embedded replicas are simply SQLite file databases, we can use them to perform backups of our data at any time using tools such as restic and the like.
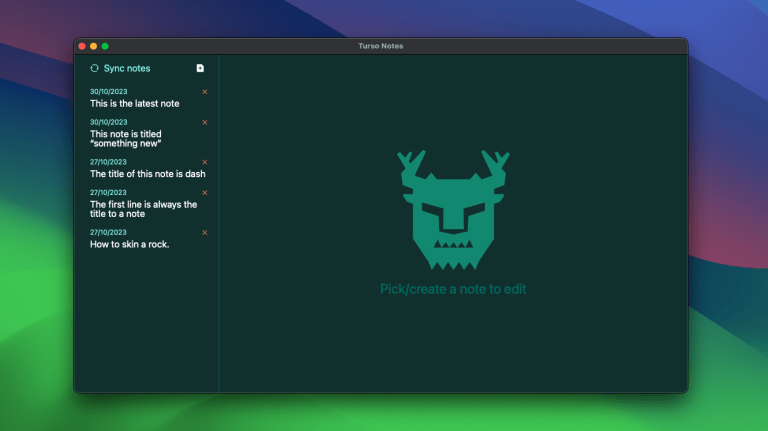
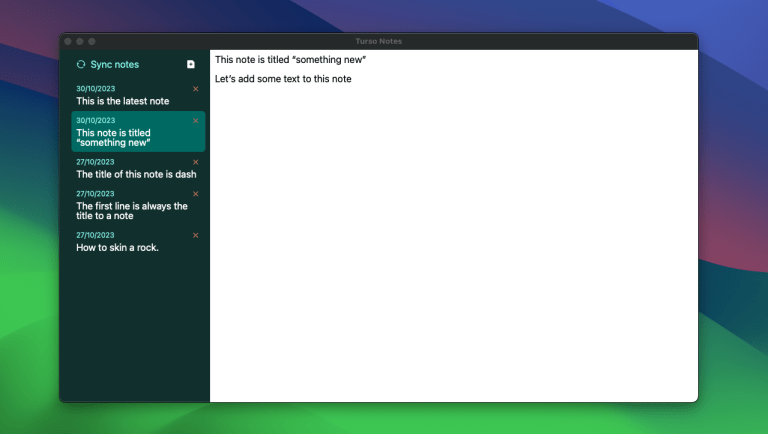
On reaching this point of the tutorial, you now have a working note-taking desktop application whose data is synchronized with your Turso database. Below are some previews of the app.


For more information on the technologies used in this tutorial you can refer to the following links: